
Building TwAIst: An AI Twitter Assistant with Chrome’s Built-in AI
How I built a privacy-first AI Twitter assistant using Chrome’s built-in AI - and what I learned about the Prompt API along the way
I built TwAIst for the Google Chrome Built-in AI Hackathon, and honestly? It started from pure frustration. I was spending way too much time staring at empty tweet boxes, trying to craft the “perfect” reply, watching my productivity disappear into the Twitter void.
But here’s what got me excited: Chrome’s new Prompt API with Gemini Nano means you can run AI completely on-device. No external API calls. No data leaving your machine. No rate limits. Just pure, privacy-first AI that works offline.
This post is for anyone wanting to get started with Chrome’s built-in AI or build Chrome extensions. I’ll walk through what I built, how the Prompt API actually works, and the lessons I learned the hard way.
Watch the demo: TwAIst Demo Video
What TwAIst Does
TwAIst is a Chrome extension that helps you create better Twitter/X content using AI - completely privately on your device.
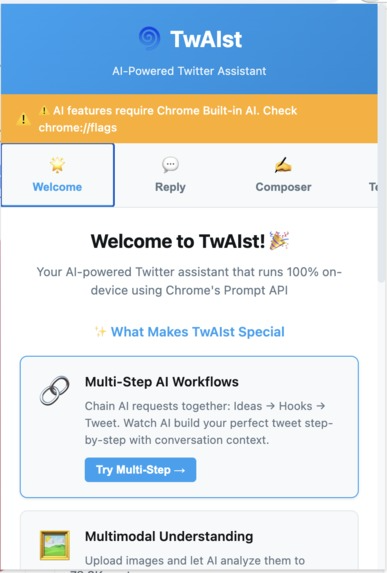
TwAIst’s welcome screen showing the main features
Core Features
1. Multi-Step Tweet Composer
This is where things get interesting. Instead of just “generate a tweet,” TwAIst uses a workflow:
- Generate ideas for any topic
- Create attention-grabbing hooks from your chosen idea
- Compose full tweets using your selected hook
- Choose from 5 different tones (casual, witty, storytelling, educational, motivational)
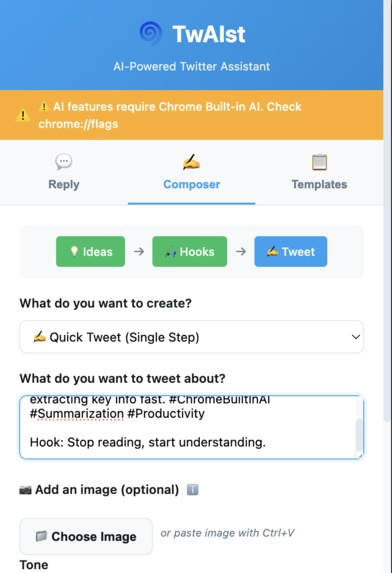
The multi-step composer showing the Ideas → Hooks → Tweet workflow
2. Smart Reply Generator
- Paste any tweet, get contextual replies in 6 different tones
- Upload images and AI analyzes them for image-aware replies
- Refine replies iteratively until they’re perfect
- Tones: friendly, humorous, personal story, thought-provoking, add insight, quick help
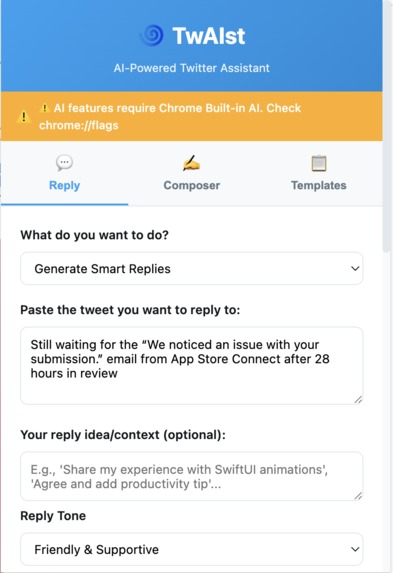
Smart reply generator with tone selection
3. Template Generator
Six proven tweet formats that go viral:
- Contrast (before/after)
- Transformation story
- Unpopular opinion
- Choose your hard
- Hook+list+question
- Struggle→solution
Credit: Template inspiration from Stijn Noorman’s viral tweet formats (@stijnnoorman)

Template generator showing different viral tweet formats
4. Advanced Features
- Multimodal support: Upload images, AI understands them for contextual content
- Conversation context: Multi-step workflow remembers previous choices
- AI parameter tuning: Adjust temperature (0.0-1.0) and top-K (1-100) for creativity control
- Device-optimal defaults: Loads hardware-specific AI parameters automatically
- Work-in-progress saving: Auto-saves your drafts locally
- Refine anything: Iteratively improve any generated content
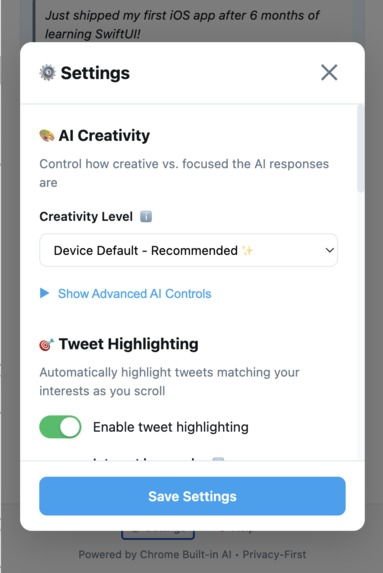
Settings panel with AI creativity controls
Getting Started with Chrome’s Built-in AI
Before you can use Chrome’s Prompt API, you need to enable it. Here’s how:
1. Enable Chrome Built-in AI
- Open Chrome and go to
chrome://flags - Search for “Prompt API for Gemini Nano”
- Enable the flag
- Restart Chrome
- Verify Gemini Nano is available by checking
chrome://componentsand ensuring “Optimization Guide On Device Model” is present
Resources:
2. Basic Prompt API Usage
The simplest way to use the Prompt API:
// Check if the API is available
if (!window.ai || !window.ai.languageModel) {
  console.error('Prompt API not available');
  return;
}

// Create a session
const session = await window.ai.languageModel.create();

// Generate text
const result = await session.prompt('Write a tweet about Chrome AI');

console.log(result);

// Clean up
session.destroy();
That’s it! But for real applications, you need more control.
The Architecture: How I Built TwAIst
Modular Design
I structured TwAIst to be modular from day one. Each feature lives in its own module:
TwAIst/
├── popup.js              # Main orchestrator
├── modules/
│   ├── composer.js       # Multi-step tweet composer
│   ├── reply-generator.js # Smart reply generator
│   ├── template-generator.js # Template system
│   └── image-handler.js  # Multimodal image processing
└── utils/
    └── ai-manager.js     # Central AI session manager
The AI Manager Pattern
Instead of creating AI sessions everywhere, I built a central ai-manager.js that handles all AI interactions. This became the single source of truth for AI operations.
// utils/ai-manager.js
class AIManager {
  constructor() {
    this.currentSession = null;
    this.abortController = null;
  }

  async initPrompt(systemPrompt, options = {}) {
    try {
      // Check API availability
      if (!window.ai || !window.ai.languageModel) {
        throw new Error('Prompt API not available');
      }

      // Clean up any existing session
      this.cleanup();

      // Create abort controller for cancellation
      this.abortController = new AbortController();

      // Create session with parameters
      const session = await window.ai.languageModel.create({
        systemPrompt,
        temperature: options.temperature || 0.7,
        topK: options.topK || 40,
        signal: this.abortController.signal
      });

      this.currentSession = session;

      return { session, abortController: this.abortController };
    } catch (error) {
      console.error('Failed to init AI session:', error);
      throw error;
    }
  }

  async initPromptWithContext(options = {}) {
    try {
      if (!window.ai || !window.ai.languageModel) {
        throw new Error('Prompt API not available');
      }

      this.cleanup();
      this.abortController = new AbortController();

      // Create session with conversation history
      const session = await window.ai.languageModel.create({
        systemPrompt: options.systemPrompt || '',
        initialPrompts: options.conversationHistory || [],
        temperature: options.temperature || 0.7,
        topK: options.topK || 40,
        signal: this.abortController.signal
      });

      this.currentSession = session;

      return { session, abortController: this.abortController };
    } catch (error) {
      console.error('Failed to init AI with context:', error);
      throw error;
    }
  }

  cancel() {
    if (this.abortController) {
      this.abortController.abort();
    }
  }

  cleanup() {
    if (this.currentSession) {
      this.currentSession.destroy();
      this.currentSession = null;
    }
    if (this.abortController) {
      this.abortController = null;
    }
  }
}

export const aiManager = new AIManager();
Why this matters:
- Single place to manage session lifecycle
- Easy cancellation with AbortSignals
- Proper cleanup to avoid memory leaks
- Centralized error handling
The Killer Feature: Multi-Step AI Workflow
The multi-step composer is what makes TwAIst feel like collaborating with AI rather than just one-shot generation. Here’s how it works:
Step 1: Generate Ideas
async function generateIdeas(topic) {
  const systemPrompt = `You are a creative brainstorming assistant.
Generate 5 unique tweet ideas about the given topic.
Each idea should be specific, interesting, and tweetable.`;

  const { session } = await aiManager.initPrompt(systemPrompt, {
    temperature: 0.8, // Higher creativity for ideation
    topK: 50
  });

  const result = await session.prompt(`Topic: ${topic}`);

  return result;
}
Step 2: Generate Hooks WITH Context
This is where conversation context becomes crucial. The AI needs to “remember” which idea the user selected:
async function generateHooks(selectedIdea) {
  // Build conversation history
  const conversationHistory = [
    {
      role: 'system',
      content: 'You are a hook-writing expert for social media.'
    },
    {
      role: 'user',
      content: `I want to write about: ${selectedIdea}`
    }
  ];

  const { session } = await aiManager.initPromptWithContext({
    conversationHistory,
    temperature: 0.7,
    topK: 40
  });

  const hooks = await session.prompt(
    'Generate 5 attention-grabbing hooks for this idea'
  );

  return hooks;
}
Step 3: Compose Tweet
Same pattern - carry the context forward:
async function composeTweet(selectedIdea, selectedHook, tone) {
  const conversationHistory = [
    {
      role: 'system',
      content: `You are a tweet composer. Write in ${tone} tone.`
    },
    {
      role: 'user',
      content: `Idea: ${selectedIdea}`
    },
    {
      role: 'assistant',
      content: `Hook: ${selectedHook}`
    }
  ];

  const { session } = await aiManager.initPromptWithContext({
    conversationHistory,
    temperature: 0.6,
    topK: 30
  });

  const tweet = await session.prompt(
    'Write a complete tweet using this hook and idea'
  );

  return tweet;
}
The magic: Each step builds on the last. The AI “remembers” the context, creating a coherent workflow that feels natural.
Multimodal AI: Working with Images
Getting image analysis working was genuinely challenging, but the results are worth it. You can upload a screenshot and TwAIst generates contextual tweets about it.
How to Process Images
async function analyzeImage(imageFile, prompt) {
  // Read image as Blob
  const imageBlob = await readFileAsBlob(imageFile);

  const systemPrompt = 'You are an image analysis expert who creates engaging social media content.';

  const { session } = await aiManager.initPrompt(systemPrompt, {
    temperature: 0.7
  });

  // Send multimodal prompt
  const result = await session.prompt([
    {
      role: 'user',
      content: [
        { type: 'text', value: prompt },
        { type: 'image', value: imageBlob }
      ]
    }
  ]);

  return result;
}

function readFileAsBlob(file) {
  return new Promise((resolve, reject) => {
    const reader = new FileReader();
    reader.onload = (e) => resolve(new Blob([e.target.result]));
    reader.onerror = reject;
    reader.readAsArrayBuffer(file);
  });
}
Important notes:
- Image processing takes 5-10 seconds - always show loading indicators
- Set user expectations: “Analyzing image… (this may take 5-10 seconds)”
- The Prompt API accepts images as Blobs
- Works best with clear, high-contrast images
Prompt Engineering: Making AI Sound Human
My first attempts at AI-generated tweets were… painful. They screamed “I WAS WRITTEN BY AI!” - lots of “Haha, okay so…” and “Bold move!” everywhere.
What Didn’t Work
❌ Longer prompts: Made it worse ❌ Asking for “casual tone”: Still sounded formal ❌ Positive instructions only: Too vague
What Actually Worked
✅ Explicit AVOID lists: Tell AI what NOT to do
const systemPrompt = `You are a friendly reply generator.

WRITING STYLE:
- Reply naturally like texting a friend
- Jump straight to your reaction
- Lowercase is OK
- Sentence fragments are OK
- Be specific, not vague

AVOID THESE PHRASES:
- "totally"
- "this is so true"
- "I agree"
- "haha okay"
- "bold move"
- "interesting take"
- "fair point"

Keep it under 280 characters.`;
The insight: Telling AI what NOT to do is more effective than telling it what TO do.
Tone-Specific Prompts
Each tone needs its own carefully crafted system prompt:
const tonePrompts = {
  friendly: `Reply warmly and supportively.
AVOID: "totally", "so true", "I agree"
Jump straight to reaction.`,

  humorous: `Reply with wit and humor.
AVOID: "haha", "lol", forced puns
Be clever, not try-hard.`,

  personal_story: `Share a brief relevant personal experience.
AVOID: "this reminds me", "funny story"
Start with the story.`,

  thought_provoking: `Ask an insightful follow-up question.
AVOID: "interesting point", "makes you think"
Go straight to the question.`,

  add_insight: `Add a valuable new perspective.
AVOID: "also", "additionally", "another thing"
State the insight directly.`,

  quick_help: `Offer practical advice or resources.
AVOID: "you should", "try this"
Give direct help.`
};
Chrome Extension Setup
TwAIst is built as a Manifest V3 Chrome extension. Here’s the basic structure:
manifest.json
{
  "manifest_version": 3,
  "name": "TwAIst - AI Twitter Assistant",
  "version": "1.0.0",
  "description": "AI-powered Twitter assistant running 100% on-device",
  "permissions": [
    "storage",
    "activeTab"
  ],
  "action": {
    "default_popup": "popup.html",
    "default_icon": {
      "16": "icons/icon16.png",
      "48": "icons/icon48.png",
      "128": "icons/icon128.png"
    }
  },
  "icons": {
    "16": "icons/icon16.png",
    "48": "icons/icon48.png",
    "128": "icons/icon128.png"
  }
}
Project Structure
TwAIst/
├── manifest.json
├── popup.html          # Main UI
├── popup.js           # Main orchestrator
├── styles.css         # Styles
├── modules/
│   ├── composer.js
│   ├── reply-generator.js
│   ├── template-generator.js
│   └── image-handler.js
├── utils/
│   └── ai-manager.js
└── icons/
    ├── icon16.png
    ├── icon48.png
    └── icon128.png
Key Lessons Learned
1. User Activation Requirement
Problem: Chrome requires user interaction before creating AI sessions.
// ❌ This will FAIL
async function init() {
  // Trying to create session on page load
  const session = await window.ai.languageModel.create();
}

init(); // Error: requires user activation
Solution: Always create sessions inside click handlers:
// ✅ This works
button.addEventListener('click', async () => {
  const session = await window.ai.languageModel.create();
  // Use session...
});
2. Set User Expectations
Image processing takes time. Don’t make users guess:
async function analyzeImage(imageBlob) {
  // Show specific loading message
  showStatus('Analyzing image... (this may take 5-10 seconds)');

  const result = await session.prompt([...]);

  hideStatus();
  return result;
}
3. Temperature and Top-K Matter
Different tasks need different parameters:
// Ideation: high creativity
{ temperature: 0.8, topK: 50 }

// Hook writing: moderate creativity
{ temperature: 0.7, topK: 40 }

// Final composition: more focused
{ temperature: 0.6, topK: 30 }

// Analytical tasks: low creativity
{ temperature: 0.3, topK: 20 }
4. Conversation Context is Powerful
The initialPrompts parameter makes multi-step workflows feel natural:
const session = await window.ai.languageModel.create({
  systemPrompt: 'You are a helpful assistant',
  initialPrompts: [
    { role: 'user', content: 'Previous step context here' },
    { role: 'assistant', content: 'AI response from previous step' }
  ]
});
5. Always Clean Up Sessions
Memory leaks are real:
class ComponentWithAI {
  async generateContent() {
    let session = null;
    try {
      session = await window.ai.languageModel.create();
      const result = await session.prompt('...');
      return result;
    } finally {
      // ALWAYS clean up, even on errors
      if (session) {
        session.destroy();
      }
    }
  }
}
The Privacy-First Advantage
Running AI on-device isn’t just about privacy - it unlocks better UX:
Benefits:
- ✅ No API roundtrips = instant responses
- ✅ No rate limits = unlimited usage
- ✅ Works offline
- ✅ No external API costs
- ✅ User data never leaves their machine
The insight: Privacy-first architecture actually creates better user experiences. In a world of constant API calls and loading spinners, on-device AI feels genuinely fast.
What’s Next for TwAIst
I’m actively developing new features:
Short-term:
- Thread unroller: paste thread URL, get intelligent summary
- Sentiment analysis: suggest optimal reply tone
- Custom tone training: analyze user’s tweets to create personalized tone
- A/B testing: generate variations, predict performance
When APIs Stabilize:
- Translation API: auto-translate while preserving tone
- Summarizer API: better thread summarization
- Rewriter API: nuanced style transformations
Long-term:
- Voice input: Speech Recognition API + Prompt API
- Analytics dashboard: track AI-generated tweet performance
- Engagement predictor: score tweets before posting
Try TwAIst
Ready to transform your Twitter workflow with privacy-first AI?
GitHub Repository: TwAIst
Installation:
- Clone the repository
- Enable Chrome Built-in AI flags (see instructions above)
- Load unpacked extension in Chrome
- Start creating better content!
For Developers: Getting Started with Chrome Built-in AI
If you’re new to Chrome’s built-in AI, here’s your roadmap:
- Read the docs: Chrome AI Documentation
- Enable the flags:
chrome://flags→ “Prompt API for Gemini Nano” - Start simple: Basic prompt/response before complex workflows
- Experiment with parameters: Temperature and top-K dramatically change outputs
- Handle errors gracefully: Not all devices support Gemini Nano yet
- Join the community: Chrome AI Hackathon
Resources
- Chrome Built-in AI Documentation
- Prompt API Guide
- Chrome AI Hackathon Resources
- TwAIst GitHub Repository
- TwAIst Demo Video
Built With AI Assistance
Full transparency: I built TwAIst using Claude Code, Anthropic’s AI-powered development tool.
This was actually a fascinating meta-experience - using AI to build an AI-powered application. Claude Code helped with:
- Architecture decisions and modular design patterns
- Writing the AI Manager abstraction layer
- Implementing the multi-step workflow with conversation context
- Debugging tricky session lifecycle issues
- Crafting effective system prompts and prompt engineering
The irony isn’t lost on me: I used an AI coding assistant to build a tool that helps people create better AI-generated content. AI building AI tools. We’re living in interesting times.
If you’re building Chrome extensions or working with new APIs, I highly recommend trying Claude Code. It significantly accelerated development and helped me navigate the Prompt API documentation more effectively.
Acknowledgments
- Template inspiration: Stijn Noorman for his excellent viral tweet formats video
- Chrome AI Team: For building the Prompt API and making on-device AI accessible
- Devpost: For hosting the Chrome Built-in AI Hackathon
Conclusion
Building TwAIst taught me that Chrome’s Prompt API is legitimately production-ready. It’s not just a toy - it enables real applications with great UX that respect user privacy.
The key lessons:
- On-device AI is faster and better for users
- Prompt engineering is 80% of the work
- Conversation context makes multi-step workflows feel natural
- Explicit AVOID lists help AI sound human
- Temperature/top-K parameters matter more than you think
Chrome’s built-in AI represents a fundamental shift: bringing AI inference to the edge, making it private, fast, and accessible. TwAIst is just the beginning.
What will you build with Chrome’s built-in AI?
Built for the Google Chrome Built-in AI Hackathon. Check out TwAIst on GitHub and let me know what you think!
Need iOS Help?
I help developers with:
- Bug fixes & debugging
- App Store rejections
- Code review & mentoring
- Claude Code training for iOS
10+ years iOS • 10+ published apps • 11,000+ students trained